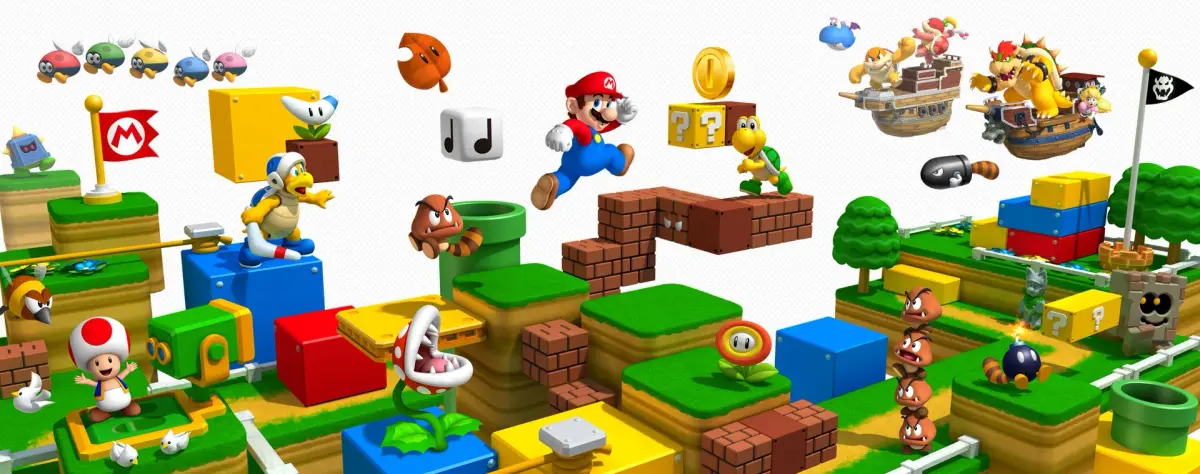
Welcome to Super Mario 3D Land! This 3DS exclusive blends the precision platforming of 2D Mario with the freedom of 3D exploration. You'll navigate vibrant worlds, mastering bouncy blocks and precise jumps as you race to thwart Bowser's latest scheme. It's a fantastic adventure perfect for both longtime fans and newcomers to the series.
This guide is your key to conquering every challenge the game throws at you. We'll help you find every hidden Star Coin, master tricky sections like Bowser's Gauntlet, and ensure you collect every power-up. Get ready to master every jump and discover all the secrets Super Mario 3D Land has to offer!
Part 1
Embark on your Super Mario 3D Land adventure! This guide covers the basics and gets you started with Part 1, offering friendly tips for beginners.
Hey there! Welcome to Super Mario 3D Land! This guide is going to be your friendly companion as we jump into this awesome game. Think of me as that experienced friend showing you the ropes, not some stuffy instruction manual. We're going to tackle this together, step-by-step, making sure you get the hang of everything without feeling overwhelmed. This first part is all about getting you comfortable with the game's unique blend of 2D and 3D Mario styles. Let's dive in and have some fun!
A Note on Spoilers: Just a heads-up, this guide does contain spoilers. Super Mario games are more about the fun gameplay than a deep story, so hopefully, it won't spoil the magic too much. You've been warned, though!
About This Walkthrough's Style: We're going for a super detailed approach here. The goal is to help beginners by explaining things clearly, even if it means the walkthroughs are a bit longer. If you're just trying to find that one tricky Star Coin, you can easily search for the level and scroll to the specific coin's location. Don't feel like you have to follow every single instruction to the letter – if you see a shortcut or an easier way to do something I've described, go for it! The main idea is to help you get through each level and find all those hidden goodies.
Introduction: So glad you're here for my Super Mario 3D Land guide! This is a really special game, blending the classic 2D Mario feel with the freedom of 3D. It's all about that perfect mix, and we're going to explore it all together. Get ready for an amazing adventure!
Part 2
Dive into Part 2 of our Super Mario 3D Land guide! We'll cover the main worlds, special worlds, and all the levels to help you save Princess Peach.
Alright, so you've gotten a feel for the game, and now we're diving into the meat of it! Part 2 is where things really start to open up. Unlike some of the older Mario games where you had a lot of freedom to explore, 3D Land keeps you pretty much on a direct path through each level. It's designed to be super accessible, which is great for newcomers, but don't worry, the Special Worlds and some of the later Normal World levels will definitely give you a good challenge. Plus, this is where you really get to see the 3DS's 3D capabilities shine!
The story here is classic Mario: Bowser, being Bowser, has nabbed Princess Peach again. You'll wake up to find a postcard from him (talk about rude!) and then it's off to the races as Mario. Your mission is to play through eight worlds, each packed with levels, to finally rescue her. It's the core Mario platforming experience you know and love – stomping Goombas, hitting those all-important ? Blocks, and making a dash for the Goal Pole at the end of each stage. They've even brought back some old-school favorites like the Goal Poles from the original Super Mario Bros., alongside new features like the climbable poles you might remember from Super Mario Galaxy. Let's get going!
Contents
Here's a breakdown of what we'll be covering:
- General Stuff: Introduction, Contents, Controls, and Move List.
- Main Worlds: We'll go through all eight main worlds, including every single level and castle/airship within them.
- Special Worlds: Get ready for an extra challenge with the Special Worlds and their unique levels.
Main Worlds Walkthrough
This is the bulk of your adventure. We'll guide you through each world, level by level.
World 1
- World 1-1
- World 1-2
- World 1-3
- World 1-4
- World 1-Castle
World 2
- World 2-1
- World 2-2
- World 2-3
- World 2-4
- World 2-Airship
World 3
- World 3-1
- World 3-2
- World 3-3
- World 3-4
- World 3-5
- World 3-Airship
World 4
- World 4-1
- World 4-2
- World 4-3
- World 4-4
- World 4-5
- World 4-Airship
World 5
- World 5-1
- World 5-2
- World 5-3
- World 5-4
- World 5-5
- World 5-Castle
World 6
- World 6-1
- World 6-2
- World 6-3
- World 6-4
- World 6-5
- World 6-Airship
World 7
- World 7-1
- World 7-2
- World 7-3
- World 7-4
- World 7-5
- World 7-Airship
World 8
- World 8-1
- World 8-2
- World 8-3
- World 8-4
- World 8-5
- World 8-Bowser's Castle
- World 8-6
- World 8-Final Castle
Special Worlds Walkthrough
Once you've conquered the main worlds, the real test begins!
Special 1
- Special 1-1
- Special 1-2
- Special 1-3
Part 3
Navigate the challenging Special Worlds of Super Mario 3D Land! This guide covers Special 1 through Special 8, including castles, airships, and the final crown course.
Alright, you've made it to the really tough stuff in Super Mario 3D Land – the Special Worlds! These levels are where the game really tests your skills, throwing all sorts of tricky platforming and challenging enemies at you. Think of them as the ultimate boss rush for your platforming abilities. We'll break down each of the Special Worlds, from Special 1 all the way up to the final challenges. Get ready, because it's about to get intense!
- 1Special 1-4: This is your first taste of the Special Worlds. Expect some tricky platforming challenges that require precise jumps.
- 2Special 1-Castle: The first castle in the Special Worlds. These often feature new mechanics or tougher enemy placements.
- 3Special 2-1 through Special 2-5: A series of levels that ramp up the difficulty. Pay close attention to enemy patterns and environmental hazards.
- 4Special 2-Airship: Airship levels are always a test of your aerial control and timing. Don't fall off!
- 5Special 3-1 through Special 3-5: Continue pushing your limits with these stages. Some might require specific power-ups to navigate effectively.
- 6Special 3-Airship: Another airship challenge, likely with new twists on the formula.
- 7Special 4-1 through Special 4-5: By now, you should be getting a feel for the Special World rhythm. Keep your reflexes sharp.
- 8Special 4-Airship: Airships in the Special Worlds often feature unique hazards like cannons or moving platforms.
- 9Special 5-1 through Special 5-5: These levels will demand mastery of Mario's moveset. Don't be afraid to experiment with different power-ups.
- 10Special 5-Castle: A castle stage that will likely test everything you've learned so far.
- 11Special 6-1 through Special 6-5: The difficulty continues to climb. Focus on conserving your power-ups and making every jump count.
- 12Special 6-Airship: Expect a challenging airship sequence here, possibly with limited space to maneuver.
- 13Special 7-1 through Special 7-5: You're nearing the end of the main Special Worlds. These levels are designed to be particularly demanding.
- 14Special 7-Castle: The penultimate castle in the Special Worlds, likely featuring a tough boss or a gauntlet of hazards.
- 15Special 8-1 through Special 8-5: The final stretch! These levels are the ultimate test, often combining elements from previous worlds in new and dangerous ways.
- 16Special 8-Bowser's Castle: This is it – the final castle before the true endgame. Prepare for a difficult gauntlet.
- 17Final Courses (W8-Final Castle Revisited & Special 8-Crown): These are the ultimate challenges. The revisited castle might have new paths or tougher enemies, and the Crown course is a true test of your platforming prowess.
- Always keep an eye on your timer! Special Worlds can be long, and running out of time is a common frustration.
- Conserve your power-ups. If you find a Fire Flower or Tanooki Leaf, try to hold onto it for as long as possible, especially before tricky sections or boss fights.
- Master the different jumps and moves Mario has. Wall jumps, long jumps, and ground pounds can be crucial for navigating certain obstacles.
- Don't get discouraged! These levels are hard by design. Take breaks if you need to, and learn from each attempt. Every failure is a lesson for the next try.
Part 4
Master Super Mario 3D Land with our comprehensive guide to controls and moves. Learn every button function and Mario's abilities for seamless gameplay.
This section of the walkthrough provides a detailed listing of all controls and moves available in Super Mario 3D Land, covering menus and in-game actions.
Controls:
Save File Selection Screen
- Circle Pad: Move Up and Down between Save Files
- D-Pad: Move Up and Down between Save Files
- A, B: Select highlighted Save File
- X, Y: No Use
- L, R: No Use
- Start: No Use
- Select: No Use
- Touch Screen: Touch Save Files to Select, Touch dot-point boxes to the left of Save Files for information on each Save File, touch the arrow in the bottom left corner to return to the Title Screen
Overworld Screen
- Circle Pad: Move character left and right between courses and worlds
- D-Pad: Move character left and right between courses and worlds
- A, B: Select level to enter
- X, Y: No Use
- L, R: No Use
- Start: Go to overworld pause menu
- Select: Go to overworld pause menu
- Touch Screen: Touch world buttons along the top of the screen to go to the corresponding world, touch a blue button below a course to move to that course, touch the blue button of the course you're currently on to enter it
Overworld Pause Menu
- Circle Pad: Move up and down between items
- D-Pad: Move up and down between items
- A, B: Select highlighted item
- X, Y: Exit out of overworld pause menu
- L, R: No Use
- Start: Exit out of overworld pause menu
- Select: Exit out of overworld pause menu
- Touch Screen: Touch items to select them
In-Game - General
- Circle Pad: Moves the player
- D-Pad: Left/Right moves the camera slightly in the corresponding direction, Up/Down changes 3D type (up is Normal View, down is Extended Depth)
- A, B: Jump
- X, Y: Hold in, use in conjunction with the Circle Pad to run
- L, R: Crouch, use in conjunction with the Circle Pad to crawl. You can hop whilst crouching and crawling.
- Touch Screen: Touch the item (if you currently have one) to use it. Touch the left and right yellow arrow buttons to move the camera slightly in the corresponding direction.
In-Game Pause Menu
- Circle Pad: Move up and down between items
- D-Pad: Move up and down between items
- A, B: Select highlighted item
- X, Y: Exit out of in-game pause menu
- L, R: No Use
- Start: Exit out of in-game pause menu
- Select: Exit out of in-game pause menu
- Touch Screen: Touch items to select them
Moves:
Moves - General
- Stomping: Land on an enemy to stomp it. Many, but not all enemies can be defeated by stomping.
- Hitting Blocks: Jump when underneath a brick or ? Block to hit it and cause it to drop coins or items. Brick Blocks will either break or turn into used blocks. ? Blocks will always turn into used blocks.
- Enter Warp Pipe: Press L/R when on a Warp Pipe facing vertically to enter it. Simply move into a horizontal Warp Pipe to enter it.
- Enter Cannon: Press L/R when on a Cannon to enter it.
- Running Jump: Press A/B when holding in X/Y and moving with the Circle Pad to perform a running jump.
- High Jump (from crouch/crawl): Hold in L/R until Mario/Luigi 'charges up', then press A/B to perform a high jump. High jumps can be performed whilst crawling.
- High Jump (on a tightrope): Hold A/B in mid-air, just before you land on the tightrope. When you land, you will immediately perform a high jump.
- High Jump (from stomping): Hold A/B in mid-air, just before you land on a stompable enemy. When you land, you will perform a high jump.
- High Jump (in mid-air): Hold A/B in mid-air. When you land... (text cut off)
Similar guides you might like


100% Human-Written. AI Fact-Checked. Community Verified. Learn how AntMag verifies content