Start the Thief vs Red Mage (Part 1) sidequest in bravely second by heading to the oasis northwest of Al-Khampis.
Walkthrough
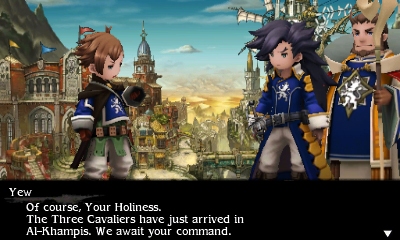
- 1Head to the oasis northwest of Al-Khampis. You can reach Al-Khampis by using the north exit, then the right exit of the Armory. This is the same oasis where you first encountered The Jackal.
- 2Speak with The Jackal at the oasis. He is concerned about the nearby oases running out of water, suspecting the Wellspring Gem is the cause.
- 3Return to Al-Khampis and cross the bridge to the east side of town.
- 4Speak to the man in red in front of the Magics store. This is DeRosa, who is interested in harnessing a new form of energy.
- 5Cross the bridge again and enter the school. Yew's research and Tiz's alertness help identify the Wellspring Gem's possible location.
- 6Leave Al-Khampis via its north exit and return to the oasis to report to The Jackal.
- 7The Jackal recalls a secret tunnel at the end of his hideout that might lead to the Wellspring Gem.
- 8On the world map, head northwest from the oasis and enter the cave on the mountainside, known as the Harena Ruins dungeon.
- 9Harena Ruins - 1F: Be cautious of statues that spew blind gas. You can avoid them by moving quickly or equip the Dungeon Master (Freelancer Level 4) ability to negate the gas.
- 10From the entrance, take the east passage to find a chest with Eye Drops.
- 11Take the westward passage. When the path splits, head east to find 200 pg.
- 12Backtrack and head west. Around the second corner, a chest is visible. Approach it from the south to avoid the gas statue above.
- 13Further east, there are two gateways with stairs going down. Descend the east-most stairs first.
- 14Downstairs, observe the room layout. A chest is in the corner, but a gas-spewing statue is to its left and directly in front of the entrance. You can run diagonally forward to avoid the gas, or trigger it and step back before running in. The chest contains a Kalasiris.
- 15Return to floor 1F and descend the remaining set of stairs.
- 16Floor B1: A few paces south of the stairs, on the right, is a gas-spewing statue. Head west for a chest containing an Ether.
- 17Return east and head south from the gas statue. When the path splits, head east, hugging the southern wall. At the far end, behind a chest, is another gas statue. Open the chest from its south side to get a Remedy.
- 18Continue east past the chest towards the corner. Head south and you will pass through a wall. Turn west to find a hidden Thief’s Knife.
- 19Back at the path split, head west, then slowly follow the passage south. A gas statue is in the center of the wall opposite the next corridor. Head east from the statue and stop underneath the torch on the wall.
- 20Hug the wall to the south, then continue east. Below the statue, run past it north to pick up 300 pg. After the gas dissipates, run back down and follow the passage east for another Remedy.
- 21Return west, hugging the wall to the south to avoid gas statues. When facing east at the statue, head south to find the stairs leading down.
- 22Floor B2: From the stairs, head east and follow the twisting passage. After the fourth corner, the path splits south and east.
- 23Head east, then inch north from the torch. A gas-spewing statue is ahead. Dash forward and to the right to loot the chest for a Hi-Potion.
- 24Carefully approach the statue, then dash diagonally left and forward to avoid its gas. Once the gas clears, dash right past the statue to find a chest with Silver Glasses.
- 25Make your way back to where the path split and head directly south, stopping near the cavern wall.
Tips
- The Dungeon Master (Freelancer Level 4) ability is highly recommended to negate the blind gas effects in the Harena Ruins.
- Be patient when navigating the gas traps; observe the patterns and use quick dashes or strategic positioning to avoid them.
- The Harena Ruins dungeon contains several chests with useful items like Eye Drops, Ether, Remedies, and money (pg).
100% Human-Written. AI Fact-Checked. Community Verified. Learn how AntMag verifies content