Welcome back to Unova! Pokémon Black 2 and White 2 build upon the foundation of the 5th generation, offering a familiar yet expanded adventure. You'll explore a region recovering from Team Plasma's actions, embarking on a journey to challenge the Pokémon League and uncover new mysteries.
This guide is your companion for mastering all that Unova has to offer. We'll help you navigate the expanded world, tackle challenging trainers, and discover every secret the region holds. Get ready to catch 'em all and become the Unova Champion!
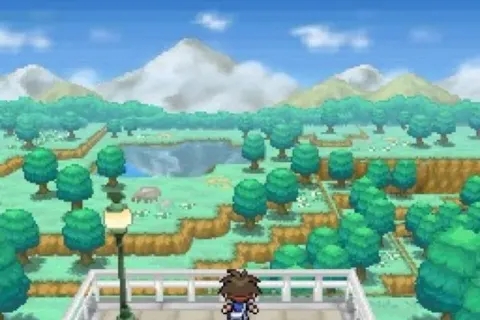
Abundant Shrine
Discover the secrets of Abundant Shrine in Pokémon Black 2 and White 2. Find hidden items, battle trainers, and learn about wild Pokémon encounters.
The Abundant Shrine is an area in Pokémon Black 2 and White 2 where trainers can find various wild Pokémon, hidden items, and battle NPCs. This guide details the trainers, items, and Pokémon available in the area.
Wild Pokémon:
- Any Grass: Vulpix (10%), Golduck (10%), Marill (10%), Swablu (20%), Bronzor (15%), Altaria (5%), Cottonee (B2) (30%), Petilil (W2) (30%)
- Shaking Grass: Ninetales (5%), Azumarill (5%), Audino (75%), Whimsicott (B2) (5%), Lilligant (W2) (5%), Emolga (10%), Slowpoke (Swarm) (40%)
- Surf: Marill (30%), Red Basculin (70%), Blue Basculin (70%), Azumarill (5%)
- Surf (Rippling): Red Basculin (60%), Blue Basculin (60%), Azumarill (5%)
- Surf/Super Rod: Red Basculin (35%), Blue Basculin (35%)
- Super Rod: Goldeen (70%), Seaking (10%)
- Super Rod (Rippling): Goldeen (60%), Seaking (10%)
- Fishing: Red Basculin (30%), Blue Basculin (30%)
- 1Upon entering, trainers will be present. Once they leave, head north up the stairs and around the soil plot to a shack. An old woman is inside, but she is senile and not worth talking to.
- 2Head south from the shack, past the water, then west along the south side of the water to a dead end. Use the Dowsing MCHN to find a hidden Calcium.
- 3Backtrack to the shack and head north-east up the stairs.
- 4Go north through the Tall Grass to the next set of stairs. Before going up, head east along the north edge of the soil plot. Use the Dowsing MCHN to find a hidden TinyMushroom.
- 5Return to the stairs and battle the Youngster. His Pokémon are Skorupi (Level 39, Poison/Bug) and Seviper (Level 39, Poison).
- 6Head north-east from the Youngster and follow the thin path north to find a Shiny Stone.
- 7Return past the Youngster and down the steps. Head west past the soil plot, then south-west to battle the Twins. Their Pokémon are Swablu (Level 38, Normal/Flying) and Swablu (Level 38, Normal/Flying).
- 8Head west past the Twins to the stairs. Go up and battle the Lass. Her Pokémon are Deerling (Level 39, Normal/Grass) and Zangoose (Level 39, Normal).
- 9Move east along the southern edge of the soil plot. Head north to find a Max Revive!.
- 10Head west along the northern edge of the soil plot and go up the stairs.
- 11Go east, then north-east to battle another Youngster. His Pokémon are Karrablast (Level 37, Bug), Shelmet (Level 37, Bug), Joltik (Level 37, Bug/Electric), and Scolipede (Level 37, Bug/Poison).
- 12Return to the north-side of the soil plot just north of the stairs. In the clearing with flowers, use the Dowsing MCHN to find a hidden Big Mushroom.
- 13Go up the steps to your north-east to find a shrine. If you have Landorus in Therian Forme in your party, you will receive a Reflecting Mirror. Landorus is not found in Black 2 or White 2 and must be obtained from previous games or Pokémon Dream Radar.
- 14South-east of the shrine, use Surf on the water to reach a small island with a Heal Ball.
- 15Move back onto the water and head to the eastern shore. Go down the steps.
- 16Talk to the Pokemon Breeder. After they move, head south through the grass to find a Rare Candy.
- 17Circle clockwise around the soil plot to the east side of the fence. Use the Dowsing MCHN to find a hidden PP Max.
After collecting all items, you can return to Route 14 or proceed elsewhere.
Abyssal Ruins
Navigate the Abyssal Ruins in Pokémon Black 2 and White 2 with this comprehensive guide. Learn exploration tips, item locations, and strategies for each floor.
- 1General Tips: Plan your routes to cover fewer tiles per run. Explore 1F in sections, fully clearing one part before moving to the next. The entrance to 2F is equidistant from all 1F entrances. For 4F, prioritize a short route to reach the Relic Crown. You can clear about two quarters of 1F per run, requiring 2-3 trips. 2F and 3F can mostly be cleared in a single run. After clearing 1F, head directly to the 2F entrance, and similarly for 2F to 3F, to save time.
- 2Required HM Pokémon: You need Pokémon that know Flash and Strength to access 3F and 4F. Flash is used on a purple block in 2F, and Strength on a block in 3F, to move them aside.
- 3Relic Items: All _Relic_ items found in the ruins can be sold to a Black Belt in the house west of the Marine Tube entrance in Undella Town. He can offer up to $300,000 for a _Relic_ item, such as the Relic Crown. Selling these items is highly recommended as they have no other use.
- 4Mysterious Text: Inspecting purple walls reveals unreadable symbols. Speaking to Zinzolin in Undella Town translates these symbols into English letters, but they must be read backwards to make sense. On 2F, read backwards one letter (e.g., 'M' becomes 'L'). On 3F, read backwards two letters. On 4F, read backwards three letters. Some symbols on 4F appear as black circles and cannot be translated.
- 5Floor 4: This floor is small and straightforward. Collect the Relic Crown from the center. You can then return to Floor 3 for more looting or intentionally get booted out of the ruins.
- 6Post-Completion Reward: After reaching the end of the ruins, Zinzolin will give you a Big Pearl the next time you speak to him.
- Minimize tile movement by planning efficient routes.
- Explore 1F in sections.
- Use Flash and Strength to overcome obstacles on 2F and 3F.
- Sell Relic items in Undella Town for substantial profit.
- Decipher the floor-specific text by reading backwards and shifting letters.
- Prioritize reaching the Relic Crown on 4F.
- Relic Crown (on Floor 4)
- Big Pearl (from Zinzolin after completing the ruins)
Accumula Town
A complete walkthrough for Accumula Town in Pokémon Black 2 and White 2, detailing item locations, trainer battles, and trade opportunities.
- 1Head east, then south, then east again to reach the Pokémon Center. Heal your Pokémon and purchase any necessary items.
- 2Exit the Pokémon Center and head west to a grassy area. Search the bin southwest of the lower bench to find a Max Repel.
- 3Go north to the building on the left. Enter and proceed to the second floor.
- 4Speak to the person at the top of the stairs to receive a Poke Ball.
- 5Talk to the woman behind the desk. Answer her two questions about your starter Pokémon's weight and size correctly to receive a Gem matching its type.
- 6Exit this building and enter the building to its right. Go to the second floor and speak to the man in the southeast corner to get a BalmMushroom.
- 7Exit this building. To the right of this building are stairs. Go up them and enter the building at the top to listen to musicians.
- 8From the stairs, head south until you reach stairs leading down to the west. Go down them.
- 9Head west and enter the building at the end. On the first floor, a girl will offer to trade a Level 40 Ambipom for your Excadrill.
- 10If you make the trade, you can then battle her Excadrill.
- 11After winning the battle, you can trade a Hippowdon for an Alakazam.
- 12If you make this second trade, you will then battle her Hippowdon, a Level 63 Stoutland, and a Sandslash.
- 13Once finished in Accumula Town, return to the Pokémon Center, heal your Pokémon, and head south into Route 1.
- Listen to the musicians in the building north of the trade building for a musical interlude.
Alder's House
Learn how to defeat the two School Kids in Alder's House in Pokémon Black 2 and White 2. Get tips on their Pokémon and types to counter them.
Alright, so you're at Alder's House, and guess what? You've got your first trainer battles! Don't sweat it, these School Kids are pretty straightforward, especially if you picked the right starter. They're basically there to get you used to battling other trainers.
Trainer Battle: School Kid
The first School Kid you face will have a Pokémon that your starter Pokémon is strong against. The second one? Well, they'll have a Pokémon that's strong against your starter, so be ready for a bit of a challenge there.
If your starter is Snivy:
| Pokemon | Level | Type |
| Panpour | 9 | Water |
If your starter is Tepig:
| Pokemon | Level | Type |
| Pansage | 9 | Grass |
If your starter is Oshawott:
| Pokemon | Level | Type |
| Pansear | 9 | Fire |
Trainer Battle: School Kid (Second One)
This second battle is a bit of a mirror image. The Pokémon they use will depend on your starter, but this time it's flipped.
If your starter is Snivy:
| Pokemon | Level | Type |
| Pansear | 9 | Fire |
If your starter is Tepig:
| Pokemon | Level | Type |
| Panpour | 9 | Water |
If your starter is Oshawott:
| Pokemon | Level | Type |
| Pansage | 9 | Grass |
After the Battles
Once you've taken down both of those School Kids, you can finally exit Alder's House. As soon as you step outside, a friendly fella will pop up and hand you the Medal Box along with your very first medal, Medal 001. Pretty neat, huh?
Shortly after that little exchange, he'll take his leave, and then Alder himself will come out of his house. Have a quick chat with him, and he'll head back inside.
Now, it's time to head back to Aspertia City. Your next goal is to challenge Cheren, the Gym Leader there. As you make your way out of town, Alder will stop you one more time. This time, he's got a little gift for you: Oran Berry x5. After you finish chatting with him, just follow Route 19 back to Aspertia City. You're one step closer to becoming a Pokémon Master!
100% Human-Written. AI Fact-Checked. Community Verified. Learn how AntMag verifies content