Follow this Bravely Default walkthrough to help Tiz and friends uncover the mystery of the sinking Grandship and secure the orichalcum needed to progress.
Alright, so we've got another chapter to tackle in Bravely Default, and this one's called "The Orphan's Care." Don't let the name fool you; it's less about sad kids and more about a sinking ship and some important MacGuffins. Let's dive in!
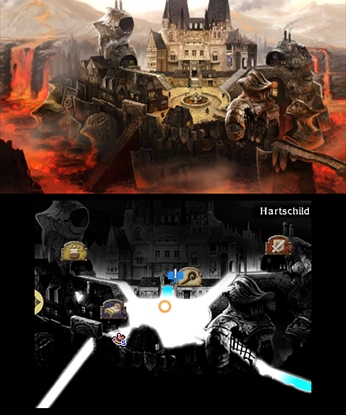
- 1
Where are we? Hartschild.
What do we see? An orange exclamation mark on Grandship.
What do we do? Set sail for Grandship. Once aboard, head to the tavern and talk to the man sitting at the central table, near the singer. He'll mention the inn at Caldisla has suddenly closed down. This piques Tiz's interest.
Why this way? This is the first clue that kicks off the whole sequence. Ignoring it means you won't know what's going on in Caldisla.
- 2
Where are we? Grandship, then Caldisla.
What do we see? A sudden closure of an inn, and a journal entry mentioning Egil.
What do we do? Sail to Caldisla and dock the Eschalot at the pier just east of town. Enter Karl's inn and see the dire situation. The party consults their journal, which says they need to bring Egil to Karl's inn. So, you'll need to head back to Hartschild to find Egil.
Why this way? You need to see the situation firsthand in Caldisla and get the journal's hint before you can proceed with Egil.
- 3
Where are we? Hartschild, at the Goodman's residence.
What do we see? Egil and Eleanor.
What do we do? Talk with Egil and Eleanor. Everyone agrees that Egil should stay at the inn in Caldisla. Once that's settled, pilot the Eschalot back to Caldisla.
Why this way? You're securing Egil's future and making arrangements for him to go to Caldisla.
- 4
Where are we? Caldisla, at the palace.
What do we see? The King.
What do we do? Head to the palace to discuss the arrangements with the king. Tiz will introduce Egil to Karl, and Karl seems to really like the boy.
Why this way? This confirms Egil's placement and resolves the immediate issue of his care.
- 5
Where are we? Caldisla, then back to Grandship.
What do we see? No immediate leads, but Ringabel's journal points to Grandship.
What do we do? With Egil settled, you need a new objective. Ringabel's journal gives a vague clue pointing back to Grandship. Head there and find the Proprietress, who tells you to visit the tavern.
Why this way? The main quest has moved on, and the journal is your only guide for now.
- 6
Where are we? Grandship's tavern.
What do we see? A banquet, then Datz and Zatz arrive with bad news.
What do we do? The Proprietress treats the group to a banquet for their help in the Eisenberg civil war. After the meal, Datz and Zatz show up, not for a chat, but to warn everyone that Grandship is sinking rapidly!
Why this way? This is the inciting incident for the next part of the chapter, introducing a new crisis.
- 7
Where are we? Grandship's deck, heading north.
What do we see? An orange exclamation mark on the bridge.
What do we do? Go to the markets on the north side of Grandship, then continue north up the stairs to reach the new orange exclamation mark. This leads you to Grandship's bridge. The group decides to search the bridge for clues about a locked door.
Why this way? You need to get to the bridge to find the next clue.
- 8
Where are we? Grandship's bridge.
What do we see? An ancient text, and a locked door.
What do we do? Edea finds an ancient text that reveals the key to the locked door is a piece of orichalcum. You'll remember Egil found some in the Mythril Mines. So, you need to return to Caldisla and get it from him at Karl's inn.
Why this way? This is the crucial step to unlocking the path forward. Without the orichalcum, you're stuck.
- 9
Where are we? Caldisla, Karl's inn.
What do we see? Egil, who has the orichalcum.
What do we do? Speak with Egil. Luckily, he's happy to hand over his chunk of orichalcum.
Why this way? You've got the key item needed to progress.
- 10
Where are we? Grandship's bridge.
What do we see? The locked door, and some items to find.
What do we do? Head back to Grandship's bridge and use the orichalcum on the locked door. It swings open! Before heading into the engine room, make sure you're stocked up. You can rest and buy items at Grandship's markets nearby. While on the bridge, check the viewing platform to the left for a Zeus's Wrath and the telescope in the top-left corner for a Turbo Ether.
Why this way? You need to use the orichalcum to open the path, and grabbing those items is good preparation.
- 11
Where are we? Grandship's engine room.
What do we see? A long trek ahead.
What do we do? Enter the engine room. The game warns you it's a long trek, so be prepared!
Why this way? This is the entrance to the next major area of the chapter.
- Remember that you can rest and resupply at Grandship's markets before diving into the engine room. It's always better to be prepared!
- Keep an eye out for those optional items on the bridge (Zeus's Wrath and Turbo Ether) – they can be very helpful.
- The journal entries are your best friend when you're stuck for leads. Don't hesitate to consult them!
100% Human-Written. AI Fact-Checked. Community Verified. Learn how AntMag verifies content