Learn to create and upload your first saved contraptions to the Garry's Mod Steam Workshop. Master basic content sharing for the GMod community.
Welcome, aspiring GMod creators! This section will guide you through the initial steps of crafting and uploading your very own content to the Garry's Mod Steam Workshop. We'll focus on the fundamental process of sharing saved contraptions, allowing you to contribute your first creations to the vast GMod community.
What Constitutes "Basic" Content?
For the purposes of this guide, "basic" content creation primarily refers to sharing your in-game builds and contraptions. This involves saving your creations within Garry's Mod and then utilizing the in-game tools to upload them directly to the Steam Workshop. While Garry's Mod supports much more complex content like custom models, textures, and Lua scripts, these require a more involved understanding of file structures and potentially external tools, which will be covered in more advanced guides.
Prerequisites for Creation
Before diving into the creation process, ensure you have the following:
- Garry's Mod Installed: A stable installation of Garry's Mod is essential.
- Steam Account: You'll need a Steam account to access the Workshop and upload your content. Ensure your Steam account is not limited (e.g., by not having purchased a game).
- Basic Understanding of GMod: Familiarity with spawning props, using tools (Weld, Physgun, etc.), and navigating the sandbox environment will be highly beneficial.
- Content Idea: Start simple! A unique vehicle, an interesting mechanism, or a well-designed structure are excellent starting points for your first upload.
Saving Your Creation (Contraptions/Builds)
The first step is to get your creation ready within the game. This involves saving your build so it can be easily accessed and uploaded.
- Load into a Map: Launch Garry's Mod and load into any sandbox map.
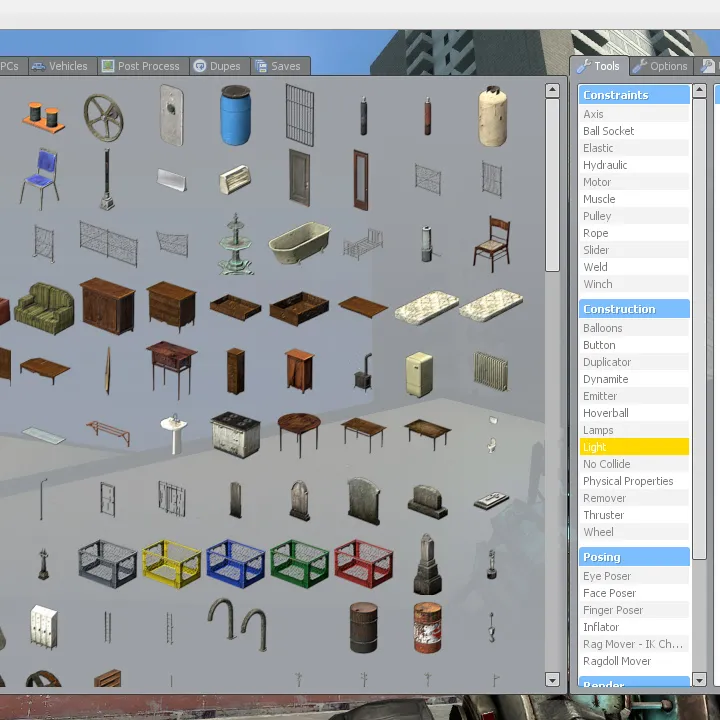
gm_constructorgm_flatgrassare common choices due to their open space. - Build Your Masterpiece: Utilize the Spawn Menu (default key:
Q) to select and spawn props. Employ tools like the Weld Tool, Physgun, Rope Tool, and Constraint Tool to assemble your creation. Experimentation is key here! - Open the Saves Menu: Press
Qto open the Spawn Menu again. Navigate to the "Saves" tab. - Create a New Save: Within the "Saves" tab, you'll find a button labeled "Create New Save". Click this button.
- Name Your Save: A prompt will appear requesting a name for your save. Choose a descriptive and unique name (e.g., "My_First_Hovercraft", "Advanced_Turret_System"). Avoid overly generic names that might conflict with default saves.
- Save the Contraption: Click the "Save" button to finalize your contraption save. This action stores your build as a file within your Garry's Mod installation, typically in the
garrysmod/saves/directory.
Understanding Addon Structure (For Future Reference)
While this guide focuses on saved contraptions, it's beneficial to be aware of how more complex content is organized. Custom content like models, textures, and Lua scripts are packaged into "addons." An addon is essentially a folder placed within the garrysmod/addons/ directory.
Basic Addon Folder Structure:
garrysmod/addons/your_addon_name/addon.txt: This is a crucial file that provides metadata about your addon.materials/: Contains custom textures (e.g.,materials/models/your_model/your_texture.vmtand.vtffiles).models/: Holds custom 3D models (e.g.,models/your_model/your_model.mdl).lua/: For custom Lua scripts that add new functionality or modify existing game elements (e.g.,lua/autorun/server/my_script.lua).
The Essential addon.txt File:
For any addon, the addon.txt file is mandatory. It tells Garry's Mod and the Steam Workshop about your creation. For a basic addon, the essential fields are:
- Title: The display name of your addon (e.g., "My Awesome Props").
- Author: Your name or alias (e.g., "YourGamerTag").
- Version: A version number for your addon (e.g., "1.0").
- Description: A brief explanation of what your addon does.
Example addon.txt content:
Title "My Awesome Props"
Author "YourGamerTag"
Version "1.0"
Description "A collection of cool props I made."
As you progress to more advanced content creation, you'll explore additional fields and complexities within addon.txt and the addon structure.
Uploading Your Saved Contraption to the Steam Workshop
Once your creation is saved locally, you're ready to share it with the Garry's Mod community via the Steam Workshop.
Using the In-Game Uploader
- Access the Workshop Menu: From the Garry's Mod main menu, navigate to the "Addons" tab, then select "Upload" from the sub-menu.
- Select Content Type: You will be presented with several options for what you want to upload. Since you saved a contraption, select "Save".
- Choose Your Creation: A list of all your locally saved contraptions will appear. Click on the name of the contraption you wish to upload (e.g., "My_First_Hovercraft").
- Provide Essential Details:
- Title: This is the name that will appear on the Workshop. Make it descriptive and engaging (e.g., "Advanced Hovercraft with Working Thrusters").
- Description: Write a thorough description. Explain what your contraption does, how to operate it (controls, key bindings), any special features, and what makes it unique. If your contraption relies on specific game modes or other Workshop items, mention them here.
- Tags: Select relevant tags from the provided list. These are crucial for discoverability. Common tags include "Vehicle", "Contraption", "Physics", "Fun", "Building", "Utility". Choose tags that accurately represent your creation.
- Visibility:
- Public: Makes your creation visible and downloadable by everyone on the Steam Workshop.
- Friends Only: Only visible and downloadable by your Steam friends. Useful for testing before a public release.
- Private: Only visible to you.
- Thumbnail: Garry's Mod will attempt to generate a thumbnail based on your saved contraption. For a better result, you can take a high-quality in-game screenshot (default key:
F12) after loading your save. You can then select this screenshot from your Steam screenshots folder to use as the thumbnail. A good thumbnail significantly increases the appeal of your upload.
- Agree to Terms: You will be presented with the Steam Workshop legal agreement. Read through it and check the box to agree to the terms.
- Upload: Click the "Upload" button. Garry's Mod will package your save file and upload it to the Steam Workshop. This process may take a few moments depending on your internet connection.
Post-Upload Management
Once your content is live on the Workshop, you can manage it further:
- View Your Item: After a successful upload, you'll usually receive a link to your item's Workshop page. Click this to see how it looks.
- Edit Details: On your item's Workshop page, you can edit the title, description, add more screenshots, embed YouTube videos, and update tags at any time. This is highly recommended to improve your item's presentation and reach.
- Respond to Comments: Engage with users who leave comments on your Workshop page. Respond to questions, thank users for feedback, and address any issues they might encounter.
- Update Your Item: If you improve your contraption or fix bugs, you can update the existing Workshop item. To do this:
- Make the changes in-game.
- Re-save your contraption using the *exact same name* as the original save.
- Go back to the in-game "Addons" -> "Upload" menu.
- Select "Save" and choose your contraption again.
- You should see an "Update" button instead of "Upload". Click it to push your changes to the Workshop.
Congratulations! You've successfully created and uploaded your first piece of content to the Garry's Mod Steam Workshop. Keep experimenting, learning, and contributing to the vibrant and creative world of GMod!
100% Human-Written. AI Fact-Checked. Community Verified. Learn how AntMag verifies content