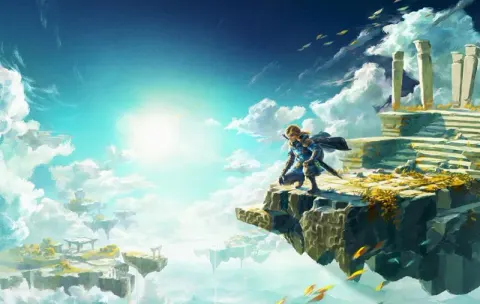
Welcome back to Hyrule, adventurer! The Legend of Zelda: Tears of the Kingdom builds upon the vast open world of its predecessor, inviting you to explore the skies above and the depths below. You'll be parrying enemy attacks, mastering the art of the sidehop, and executing precise backflips to overcome challenges both familiar and new. This is a journey of discovery, resourcefulness, and epic confrontation.
This guide is your essential companion for navigating the intricacies of Hyrule. We'll break down every combat control, ensuring you can effectively sidehop, backflip, and parry your way through Ganondorf's forces. Whether you're aiming to master every enemy encounter or simply want to understand the full breadth of Link's combat capabilities, we've got you covered.
How to Get Autobuild in Tears of the Kingdom: Building
Learn how to unlock the powerful Autobuild ability in The Legend of Zelda: Tears of the Kingdom. Follow our step-by-step guide to find it in the Depths.
How to Get Autobuild in Tears of the Kingdom: Building
Learn how to unlock the powerful Autobuild ability in The Legend of Zelda: Tears of the Kingdom. Follow our step-by-step guide to find it in the Depths.

Autobuild Recipes
Master Autobuild in Tears of the Kingdom! This guide breaks down how to find and use Autobuild recipes, essential for efficient building and progression. Learn strategies and tips.
Autobuild Recipes
Master Autobuild in Tears of the Kingdom! This guide breaks down how to find and use Autobuild recipes, essential for efficient building and progression. Learn strategies and tips.
How to Get Autobuild in Tears of the Kingdom: To In Of
Learn how to unlock the powerful Autobuild ability in The Legend of Zelda: Tears of the Kingdom. Follow our guide to find the Great Abandoned Central Mine and master this essential building tool.
Alright, so you're looking to get your hands on Autobuild in The Legend of Zelda: Tears of the Kingdom. This is a super handy ability that basically lets you instantly craft machines and contraptions you've already built, using Zonaite as currency. It's a real game-changer for making complex builds without scrambling for every single piece. Let's get you set up with it!
The key to getting Autobuild is venturing into the Depths, that mysterious underground world. If you haven't been down there yet, you'll find entrances via Chasms scattered all over Hyrule. These lead you into the darkness where things can get a bit dicey with tougher enemies and that nasty Gloom.
For the quickest route to Autobuild, you'll want to head for the Great Plateau North Chasm. It's pretty much directly south of Lookout Landing, right as you enter the Great Plateau area. If you're having trouble pinpointing it, activating the Hyrule Field Skyview Tower will help reveal the map, or you can use a map marker if you've found one.
Once you're at the Chasm, take the plunge! Just remember to get your Paraglider out before you hit the ground – nobody wants a flat Link. When you land, immediately head west. You're looking for the Nogukoyk Lightroot. Activating this will light up the immediate area, making navigation much easier.
From the Nogukoyk Lightroot, make your way directly south. You should see a dimly lit structure ahead – that's the Great Abandoned Central Mine, and it's where you'll find Autobuild. Head inside and look for the Researchers who are busy surveying the area.
Chat with the Researchers. They'll mention their vehicles are broken and they're trying to get a Construct working to help fix things. Find the Construct – you'll see a green Ultrahand-like symbol glowing from it. Interact with this symbol to activate it and start the conversation.
The Construct will then teach you Autobuild right then and there! No puzzles, no fights, just a straightforward tutorial. You'll then go through a quick practice session where you'll build a vehicle for the Researchers, and then use Autobuild to instantly create a second one. After this, you'll find out the Researchers are actually Yiga Clan members, and their leader, Master Kohga, will challenge you to a fight. We've got a separate guide for that boss battle if you need it!
All Schema Stone Locations in Zelda Tears of the Kingdom
Discover the exact locations of all Schema Stones in The Legend of Zelda: Tears of the Kingdom. This guide helps you find these crucial items for building advanced Zonai devices.
This guide is a walkthrough for The Legend of Zelda: Tears of the Kingdom. It is designed to be spoiler-free and covers various aspects of the game, including collectibles, quests, and exploration. The guide is structured to help players navigate through the game's regions and find important items and locations.
The guide details the locations of 1,000 Korok Seeds, 152 Shrines, 130 Side Quests, 31 Shrine Quests, 60 Side Adventures, 69 'Noxes', 86 Taluses, 4 Molduga, 35 Flux Constructs, 40 Froxes, 14 Gleeoks, 120 Lightroots, 147 Caves, 58 Wells, 20 Sage's Wills, 12 Dragon's Tears, 13 Zonai Reliefs, 15 Skyview Towers, and 81 Hudson Signs.
Navigation within the guide relies on compass directions and coordinates. The in-game minimap can be set to always point North for easier navigation. The guide also references Zelda Dungeon's Interactive TOTK Map for player convenience.
Specific sections address:
- Hyrule Compendium: While not directly covered, it's recommended to fill it as you play. Unfilled entries can be purchased at the Hateno Ancient Tech Lab.
- Shrines: The guide provides locations but not solutions. For 100% completion, all chests within Shrines must be opened.
- Caves: Full completion requires killing the Bubbulfrog in each cave and discovering all cave entrances.
- Device Dispensers: All Zonai Device Dispensers should be mapped for full map completion.
- amiibo: These are optional and not required for the guide's completion.
- Koroks: The guide covers all 900 Koroks, with explanations and images for various types of Korok puzzles including Rock, Rock Pattern, Metal Block Puzzle, Offering, Fairylight, Pinwheel Shooting, Lilies, Flower Trail, Race, Glide Challenge, Backpack, Shelter, Ascend, and Dandelion.
- Mini-bosses: These are covered as they appear in the walkthrough. Players are advised to return later if they encounter difficulty.
- Depths Locations: All named locations in the Depths contain a Large Crystallized Charge. Abandoned Mines have Forge Constructs that count towards map completion.
- Side Quests and Upgrades: Side Quests are noted if they can be completed during later backtracks. Armor upgrades are available at 'Upgrade Points'.
- Camera: Once unlocked, players need to take pictures of specific enemies for Side Quests.
- Farming Dragon Parts: It's recommended to get the Traveler Medallion early for efficient farming.
100% Human-Written. AI Fact-Checked. Community Verified. Learn how AntMag verifies content